Fried Oreo Cheesecake Bites: Crispy Indulgence
Indulge in my Fried Oreo Cheesecake Bites - Crispy Treats! Easy to make and perfect for parties, these warm, bite-sized desserts will satisfy any sweet craving.

- Sweet Start to a Crispy Adventure
- History Meets Modern Flavor
- Eating Your Way to Happiness
- Time to Gather Your Ingredients!
- Your Essential Ingredients Guide for Epic Fried Oreo Cheesecake Bites
- Professional Cooking: Mastering Your Kitchen
- Pro Tips & Secrets for Fried Oreo Cheesecake Bites
- Perfect Presentation for Eye-Catching Treats
- Storage & Make-Ahead Tips
- Creative Variations to Make it Your Own
- Complete Nutrition Guide
- Wrapping It Up
- Frequently Asked Questions
- Recipe Card
Sweet Start to a Crispy Adventure
Oh my gosh, let me tell you about the first time i bit into a fried oreo cheesecake bite —it was like the universe whispered, “this is the good stuff.
” picture it: a summer barbecue, friends gathered around, the scent of grilled burgers in the air, and someone—probably my friend lisa, queen of the kitchen—decides to whip out this crispy treat.
I was hooked from the first crunch. seriously, who knew the combination of cheesecake and oreo could feel so indulgent—and let's be honest, slightly rebellious?
These little bites boast all the crunchy goodness of fried desserts while offering that creamy, dreamy center we all crave.
Whether you're planning a party or just have a sweet tooth to satisfy, these are the go-to bite-sized treats worth every moment spent frying.
Trust me; they call them indulgent snacks for a reason!
History Meets Modern Flavor
Now, let's dive into the backstory a bit. the idea of combining fried foods with desserts isn’t exactly groundbreaking—hello, funnel cakes and donuts! but the fried oreo cheesecake bites ? oh boy, they really stepped up the game.
Originally becoming popular at state fairs and festivals, this trend exploded into home kitchens when people wanted to recreate that blissful experience at home.
Today, they're all the rage at parties, serving as the perfect crowd-pleaser. they fit right in amongst party desserts like brownies and cupcakes.
And honestly, who can resist those crispy exteriors hiding that creamy filling? the combo is timeless, making these golden bites a staple in any dessert rotation.
Now, let’s get down to specifics. you’re looking at about 55 minutes total time — 15 minutes of active prep, plus a bit of chilling, and just 10 minutes of frying.
Sounds easy enough, right? the difficulty level hovers around medium because you’ll need to pay attention while frying to get that perfect crispy texture.
And the cost? pretty friendly, considering you can whip up 12-15 bites without breaking the bank!
Eating Your Way to Happiness
Okay, let's fast forward to some reasons you’ll love these little guys. first off, think about the health benefits of cream cheese and oreos (well, if you squint a little, they could be good for you).
The cream cheese packs in some protein, and who can resist not eating a few oreos every now and then?
Plus, they’re perfect for special occasions . whether it’s a birthday party or a casual friday night, these chocolate treats can light up the dessert table.
Instead of another no-bake cheesecake alternative , impress your friends with something unique and oh-so-decadent.
And can we talk about the versatility? you can swap in different cookies or add in fun flavor combinations, creating your own dessert variations .
It’s like a little canvas for your creativity!
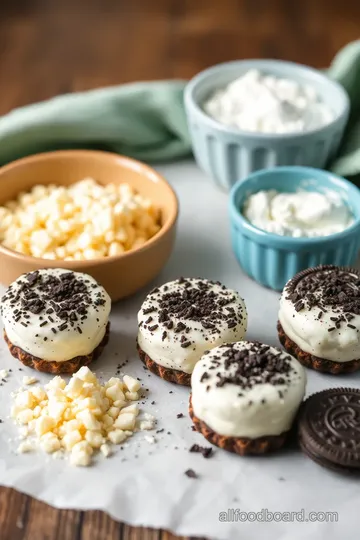
Time to Gather Your Ingredients!
Feeling intrigued? i thought so! the next big step is to gather your ingredients to start this crispy treat adventure.
Grab some oreos, cream cheese, and your frying supplies. you’ll have a basket full of flavors that will make your friends question your dessert-making superpowers.
But before we dive into the actual ingredient list, just know that having everything ready to go makes the process a breeze. Trust me, nothing's worse than scrambling through the pantry mid-recipe!
So get ready to whip up those Fried Oreo Cheesecake Bites —you won’t regret this crispy, crunchy endeavor. Let’s get cookin’!
Your Essential Ingredients Guide for Epic Fried Oreo Cheesecake Bites
Alright, let’s dive into the tasty world of making Fried Oreo Cheesecake Bites - Crispy Treats . If you’re looking to whip up some fried desserts that’ll steal the show at your next get-together, getting to know your essential ingredients is key!
Premium Core Components
First things first, let’s get you prepped with the core ingredients. Here’s a breakdown:
-
8 oz (227 g) cream cheese: look for the block type, not the spread. it should feel soft when you touch it, and definitely not grainy.
Cream cheese is a game-changer in creamy desserts like our cheesecake bites .
-
1/2 cup (100 g) granulated sugar: Pick a good brand, because it should dissolve easily into our filling. This is what will give you that sweet tooth satisfaction!
-
1/4 cup (60 ml) sour cream: Aim for full-fat; it keeps things rich and delicious. Check the date and give it a sniff—nothing yuckier than bad sour cream.
-
10 Oreo cookies, crushed: I mean, c’mon, it’s an Oreo dessert, so go for fresh ones. They should be crisp, not squishy. You want that iconic chocolatey goodness !
-
Oil for frying: Get yourself some vegetable or canola oil. It needs to be hot enough—around 350° F ( 175° C) is your sweet spot for that perfect crunchy texture .
And storage? Keep anything leftover in an airtight container in the fridge. Most of these will last about a week—if they even last that long!
Signature Seasoning Blend
Now, if you’re thinking about how to spice things up, it’s all about those signature blends. for our fried oreo cheesecake bites, we’re keeping it pretty simple, but don’t forget that sprinkle of powdered sugar for garnish.
It’s like the cherry on top!
Smart Substitutions
Not all of us have the same pantry vibe, so here are some quick substitutions:
- No sour cream? Swap in plain Greek yogurt. Seriously, it’s a no-bake cheesecake alternative and adds a nice tang.
- Got gluten-free folks? Use gluten-free flour—nobody needs to miss out on these bite-sized treats !
- If you’re missing Oreos, use other cookies like Nutter Butters. Trust me, it’s a game-changer with a different flavor profile.
Kitchen Equipment Essentials
Before you dive into frying up these sweet appetizers , let’s check your tools:
- Frying pan or deep fryer: If you have a deep fryer, great! If not, a sturdy frying pan will work beautifully.
- Slotted spoon: Seriously, you’ll thank me later when you’re fishing out those crispy bites and letting the oil drain.
And remember, having a parchment-lined baking sheet is a lifesaver for cooling.
Pro Tip on Frying Techniques
Okay, listen up! if you want easy fried desserts , temperature control is everything. if your oil isn’t hot enough, you’ll be left with greasy bites.
On the flip side, too hot and you risk burning them. the sweet spot? stick to around 350° f ( 175° c) and be patient!
Wrapping It Up
Alright, friends, after gathering these ingredients and equipment, you’re all set to make some decadent desserts that scream “i’m ready for the party!” keep those tips in mind, and your kitchen will feel like a fry station of goodness .
Next, we’ll dive right into these delicious instructions—you won’t want to miss how simple it is to whip up Fried Oreo Cheesecake Bites. So, let’s get cooking!
Professional Cooking: Mastering Your Kitchen
So, you wanna whip up some awe-inspiring fried oreo cheesecake bites - crispy treats for your next gathering? trust me, these little delights will have everyone raving and begging for seconds.
With a little preparation and some pro techniques, you’ll be a dessert superstar in no time!
Essential Preparation Steps
First things first. let’s chat about mise en place , which is a fancy french way of saying "everything in its place.
" before you dive into making those delicious fried desserts, gather all your ingredients and tools. it saves time and keeps your kitchen from turning into a chaotic mess.
Plus, nothing feels better than smoothly moving from one step to the next without scrambling for some flour or a mixing bowl.
Next up is time management . measure out what you need ahead of time. spend about 15 minutes prepping the filling before you chill it for 30 minutes .
Don’t forget it while you're frying—those warm bites are best fresh!
And hey, organization is key. keep your workstation clean and clear. i like to have a designated area for mixing, another for frying, and a place to cool those crispy bites afterward.
Trust me; it helps!
Don’t forget safety! that hot oil is nothing to mess around with. keep a close eye on it and use a thermometer if you can.
We’re going for 350° f (that's about 175° c ) for frying, so make sure you watch for that crucial temperature point.
No one wants burns or soggy bites.
Step-by-Step Process
Ready to get cooking? Here’s your clear roadmap:
-
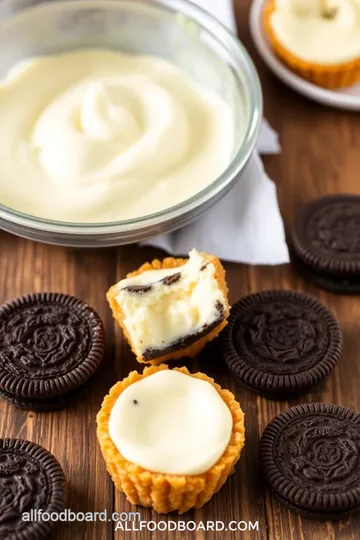
Prepare the filling : mix 8 oz of softened cream cheese, 1/2 cup of sugar, 1/4 cup of sour cream, and a hint of vanilla until creamy.
Fold in 10 crushed oreos. chill that goodness for 30 minutes .
-
Form the Bites : Grab about a tablespoon of the chilled filling and shape it into a ball. Lay those on a baking sheet—the more, the merrier!
-
Prepare the batter : in another bowl, whisk together a cup of flour, 1/2 cup milk, one egg, and a bit of baking powder.
Make sure it's smooth; nobody likes clumps in their batter.
-
Heat the Oil : Grab a frying pan and heat your oil on medium. We want it nice and hot at 350° F . This is where the magic happens!
-
Coat and fry : dip each cute little cheesecake ball into the batter before placing it in the hot oil.
Fry until they're golden brown, about 2- 3 minutes per side. make sure you use a slotted spoon to scoop them out—no soggy bites, please!
-
Serve : Dust with powdered sugar for that extra pizazz and serve them warm.
Expert Techniques
Want to take it up a notch? Here are some expert tips to avoid common pitfalls:
- Cooling the filling is non-negotiable—trust me. It makes the filling firmer and easier to work with.
- Monitor the oil carefully. If it’s not hot enough, your bites will soak up too much oil and be greasy—yuck!
- Keep a close watch on the color while frying. You’re looking for that perfect golden brown.
If by chance you burn some, don't sweat it! Just switch up your frying technique or check the oil temperature. Cooking is all about learning, right?
Success Strategies
Even the best can trip up. Here’s what to keep in mind:
- Common Mistakes : Don't overcrowd your pan when frying! It drops the oil temperature and results in soggy bites.
- Check Quality : Give them a taste test. If they’re not quite right, repeat the frying steps with focus.
- Aim for perfect results by serving immediately. They’re best fresh outta the fryer!
Make-ahead options? Yes, please! You can prep the filling and form the bites a day in advance, then fry when ready.
These Fried Oreo Cheesecake Bites are bound to be the sweet appetizers that everyone will remember. Sharing dessert ideas for parties is always a joy, especially when they turn out this good!
So, whether it's a cozy family night or a big bash, you’ll be the go-to for indulgent snacks that satisfy even the strongest sweet cravings .
Additional Information...
When it comes to exploring cookie cheesecake variations or even no-bake cheesecake alternatives , the sky's the limit! keep trying new ideas and flavor combinations until you find what speaks to your taste buds and those of your party guests.
Pro Tips & Secrets for Fried Oreo Cheesecake Bites
Oh my gosh, if you’re diving into the world of Fried Oreo Cheesecake Bites - those crispy treats that everyone loves, I've got some pro tips to make sure yours come out perfect every single time!
First off, chill that filling . give it a good 30 minutes in the fridge. this will not only help you shape the bites easier, but it also enhances that creamy filling flavor.
Can you imagine biting into a warm, crunchy outside, and tasting that chilly, creamy cheesecake inside? pure bliss!
Another thing, let’s talk about frying. you want to heat the oil to about 350° f ( 175° c) . if it’s not hot enough, your bites will get soggy.
Seriously, nobody wants a soggy bite! it’s all about getting that crispy outside and not overcooking the insides.
And if you're worried about making a mess, don't be! just use a slotted spoon to handle the bites. fry them in small batches, too.
This keeps the oil temperature stable and helps them cook evenly.
Perfect Presentation for Eye-Catching Treats
Now, let’s make these bites look as good as they taste! when you plate these sweet appetizers , presentation is key.
You can dust them with a bit of powdered sugar before serving—or even drizzle chocolate sauce on the plate for that classy vibe.
As for garnishes, fresh berries or sprigs of mint can really pop against the golden brown of the bites. You want those colors to contrast nicely, right? A little bit of green or red can make all the difference in food photography so grab your phone to snap that pic before diving in!
Storage & Make-Ahead Tips
Wanna prep ahead of time? just freeze the un-fried bites after you roll them. they can stay in the freezer for up to a month! whenever your sweet cravings hit, pop them straight into hot oil from the freezer.
This will save you time, especially for kids dessert recipes or unexpected guests!
If you've got leftovers (which, let’s be real, is a rarity with these bites!), store in an airtight container. though, they're best enjoyed fresh, you can reheat them in an oven at 350° f ( 175° c) for a few minutes.
They won’t have that initial crispiness, but no one’s really grading you here, right?
Creative Variations to Make it Your Own
Feeling adventurous? there are so many dessert variations you can try! swap out oreos for nutter butters for a peanut butter lover's dream or use gluten-free cookies to cater to your friends with dietary restrictions.
Maybe add in a splash of almond extract to the cheesecake filling for a twist that'll have everyone talking at your next gathering!
Seasonal twists can be fun too. In fall, try pumpkin-spiced Oreos for a festive treat. As the weather warms up, what about some fruity cheesecake filling with berries? There’s just no end to the delicious options!
Complete Nutrition Guide
Now, let’s break down the nutritional side of these indulgent snacks. each bite-sized treat contains about 150 calories . not too shabby for a dessert that feels like a party in your mouth! to lighten it up a bit, consider swapping cream cheese for a low-fat version; that way you can indulge just a little guilt-free.
These bites are certainly a comfort food that satisfies those sweet cravings but keep in mind moderation is key. You’ll want to stick to about two or three bites because let’s face it – they're very decadent!
Wrapping It Up
So there you have it, everything you need to whip up some incredible fried oreo cheesecake bites - crispy treats ! they’re perfect for any gathering, easy party recipes , or just as a special weekend treat.
I promise, once you make them, they’ll become a go-to for you and your friends.
look into in, experiment, find your flavor combinations, and most of all, enjoy the process! Seriously, cooking should be fun! You got this, and I’m cheering you on all the way!
Frequently Asked Questions
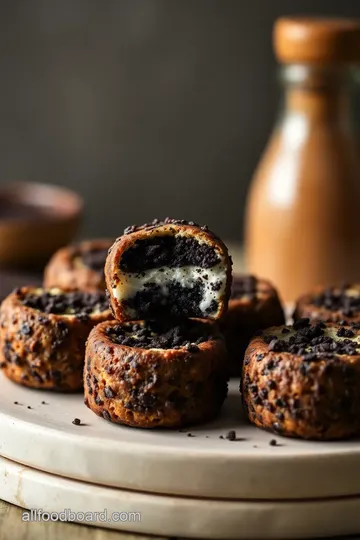
What are Fried Oreo Cheesecake Bites - Crispy Treats?
Fried Oreo Cheesecake Bites are a delicious fusion of creamy cheesecake filling and classic Oreo cookies, all enveloped in a crispy batter. These bite-sized treats are deep-fried to achieve a crunchy exterior while keeping the inside rich and velvety. They're perfect for parties or a sweet indulgence at home!
How do I ensure my Fried Oreo Cheesecake Bites turn out crispy?
To achieve that perfect crispy texture, make sure the oil is at the right temperature (around 350°F or 175°C) before frying. Additionally, avoid overcrowding the frying pan, which can lower the oil temperature and result in soggy bites. Fry in small batches and keep an eye on them until they are golden brown.
Can I make Fried Oreo Cheesecake Bites ahead of time?
While it's best to fry and serve these bites immediately for optimal texture, you can prepare the cheesecake filling a day in advance and keep it chilled. Form the bites and coat them in batter just before frying. If you have leftovers, store them in an airtight container at room temperature for a few hours, but they are best enjoyed fresh.
What variations can I try with Fried Oreo Cheesecake Bites?
You can customize your Fried Oreo Cheesecake Bites by using different types of cookies, like Nutter Butter or Golden Oreos, for a unique flavor. Additionally, consider adding flavorings such as almond extract or even incorporating chocolate chips into the filling. For a gluten-free option, use gluten-free flour in the batter.
Are Fried Oreo Cheesecake Bites suitable for dietary restrictions?
If you're catering to dietary restrictions, there are several substitutions you can make. Use dairy-free milk and coconut cream for a dairy-free version. For gluten-free options, simply swap the all-purpose flour with a gluten-free alternative. Always check labels to ensure all ingredients meet your dietary needs.
What can I serve with Fried Oreo Cheesecake Bites?
These bites pair excellently with a variety of dips and sides. Consider serving them with a scoop of vanilla ice cream, chocolate, or raspberry sauce for an extra indulgent treat. A side of chilled milk or sweet dessert wine also complements the sweetness beautifully.
Fried Oreo Cheesecake Bites: Crispy Indulgence Card

⚖️ Ingredients:
- 8 oz (227 g) cream cheese, softened
- 1/2 cup (100 g) granulated sugar
- 1/4 cup (60 ml) sour cream
- 1/2 tsp vanilla extract
- 10 Oreo cookies, crushed
- 1 cup (125 g) all-purpose flour
- 1/2 cup (120 ml) milk
- 1 large egg
- 1 tsp baking powder
- 1/2 tsp vanilla extract
- Oil for frying (vegetable or canola)
- Powdered sugar (optional)
🥄 Instructions:
- Step 1: In a mixing bowl, combine softened cream cheese, sugar, sour cream, and vanilla. Mix until smooth and creamy. Gently fold in crushed Oreos. Chill filling in the refrigerator for 30 minutes.
- Step 2: Once chilled, scoop the filling (about 1 tablespoon per bite) and shape each scoop into a ball. Place on a lined baking sheet.
- Step 3: In a clean bowl, whisk together flour, milk, egg, baking powder, and vanilla until smooth.
- Step 4: In a frying pan or deep fryer, heat oil over medium heat (approximately 350°F or 175°C).
- Step 5: Dip each filled ball into the batter, then carefully place in hot oil. Fry until golden brown, about 2-3 minutes per side. Use a slotted spoon to transfer cooked bites to a cooling rack.
- Step 6: Dust with powdered sugar if desired and serve warm.
Previous Recipe: Indulge in My Poached Lobster Creamy Risotto Delight: A Luxurious Treat!
Next Recipe: Bake Funfetti Cookies: Soft & Colorful Treats - A Family Favorite!