Perfectly Sticky Sushi Rice: A Beginner's Guide
Discover how to make sushi rice at home! This easy recipe ensures perfectly sticky sushi rice every time. Elevate your sushi game with my tips!

- Your New Best Friend: Perfectly Sticky Sushi Rice
- A Little About Sushi Rice
- Why You Need to Make Sushi Rice
- Essential Ingredients Guide
- Perfectly Sticky Sushi Rice: A Beginner's Guide
- Pro Tips & Secrets for the Perfect Sticky Sushi Rice
- Perfect Presentation Tips for Your Sushi Rice
- Storage & Make-Ahead for Maximum Enjoyment
- Creative Variations for Sushi Rice
- Complete Nutrition Guide for a Guilt-Free Indulgence
- Wrapping It All Up
- Frequently Asked Questions
- Recipe Card
Your New Best Friend: Perfectly Sticky Sushi Rice
Oh my gosh, let me tell you a little story that will totally set the vibe for this whole sushi rice thing! picture this: it's a rainy saturday afternoon, and i’m feeling all crafty in the kitchen.
I decided to whip up some homemade sushi rolls, right? but, folks, i was missing one crucial element— sushi rice ! i mean, how can you make sushi without that glorious, sticky foundation? it's like a pizza without cheese—just wrong.
When i finally nailed this sticky sushi rice recipe , my sushi game was on point. spoiler alert: the rolls were a hit, and i might’ve started a mini sushi party if i’m being honest.
A Little About Sushi Rice
Now, sushi rice isn’t just any old rice; it’s a short-grain variety that’s got a bit of sweet and a whole lotta sticky to it.
This gem comes from japan, dating back centuries. they’ve been using it in sushi for forever! but don’t worry; this isn’t just a tradition for sushi chefs; it’s something you can totally crush at home!
These days, sushi rice is super popular, thanks to all those sushi joints popping up everywhere. you can whip this up and impress your friends or family during movie night or even game day! this easy sushi rice recipe takes about an hour and five minutes , including a 30-minute soak .
It’s easy, peasy, and shouldn’t stress you out at all. you’ll get about four servings , which is kind of perfect for a couple of rolls or to pile on some sashimi.
Plus, it's not gonna break the bank—just a few bucks for some rice and vinegar.
Why You Need to Make Sushi Rice
Okay, let’s break down the goodness of this sushi rice a bit more. first off, it's loaded with carbs, so it’s a great energy booster ! each serving packs about 210 calories , giving you a little kick without feeling like you overindulged.
And you know what? you can even jazz it up by adding some mirin or sesame oil if you feel fancy.
But wait, there’s more! this recipe is perfect for parties or special occasions. seriously, you can wow your guests with homemade sushi and look like a pro.
It’s also a fun activity for family night. everyone can roll their own little sushi masterpieces! the key advantage is versatility; you can dress it up as nigiri , wrap it in seaweed for rolls, or just enjoy it alongside some cooked fish sushi .
Now, i know what you’re thinking. "is it really as easy as it sounds?” trust me, it is! you don’t need a culinary degree to make this! just a rice cooker (or a pot if you’re fancy) and a little patience.
I’ve had my fair share of disasters, but i’m telling ya, this one is fail-proof !
So, without further ado, let's jump into the ingredients section . you’re gonna need a couple of things to get started on your journey to sushi rice perfection.
Trust me, this will become your go-to recipe for making sushi at home. just wait until you see how easy it is to impress everyone with this one! ready? let’s do this!

Essential Ingredients Guide
Alright, let’s get down to the basics of creating that perfect sushi experience at home! sushi rice isn’t just any rice; it’s the heartbeat of your sushi creations.
Let’s dive into some indispensable tips that will make your sushi nights legendary.
Premium Core Components
Measurements matter! for our sushi rice, you’ll need 2 cups of sushi rice (320g) and 2 1/2 cups of water (600ml) .
Think of this as your magic formula. keeping it simple ensures you’ve got a great base for that sticky sushi rice recipe .
Quality indicators are essential too! look for rice that’s short-grain and a little plump. it should feel slightly sticky when cooked, and the grains should stick together without being mushy.
If it's a bit shiny, you’ve hit the jackpot!
Storage is key! keep your sushi rice in an airtight container in a cool, dry place. trust me, it can last up to a year if stored right.
Just don’t leave it hanging around too long or it’ll lose that lovely bite.
Freshness Tips: Always rinse your rice until the water runs clear. This little trick helps you achieve that right texture. Honestly, it makes a world of difference.
Signature Seasoning Blend
Next up, let’s jazz up that sushi rice with some serious flavor! you’ll need a mix of rice vinegar (1/3 cup or 80ml) , sugar (3 tbsp or 36g) , and salt (1 tsp or 6g) .
This is where the magic happens.
Try adding a dash of mirin if you want that sweet kick! it’s like a music jam for your sushi rice.
You can also experiment with herbs, like adding a few sesame seeds for extra flair.
What if you're feeling adventurous? regional variations are your best friend! use flavored vinegar or try tossing in some citrus zest to switch things up a bit.
The world is your oyster... or should i say sushi roll?
Smart Substitutions
Sometimes life throws you a curveball. if you find yourself without sushi rice, no sweat! arborio rice can work as a substitute in a pinch.
It won’t be the same but hey, it'll still get the job done!
Dietary modifications? you bet! if you want to lower the sugar without sacrificing flavor, add a splash more vinegar. it balances things out beautifully.
In a hurry? use how to make sushi rice with regular rice instructions to get a faster version. just keep an eye on the cooking time!
Kitchen Equipment Essentials
Grab your must-haves! you don’t need a fancy kitchen to make sushi rice shine. a simple rice cooker is excellent, but a heavy-bottomed pot does the trick too.
Just make sure it has a lid.
Need something quick? use a fine-mesh sieve to rinse that rice like it’s your job. a wooden spoon or rice paddle will gently fluff it without making a mushy mess.
No one wants mush when you can have how to make sticky rice for sushi like a pro!
Finally, storage solutions: Keep that cooled rice in an airtight container until you’re ready to roll. Just be sure to use it within a day for the best flavor.
Wrapping It All Up
Now you're armed with everything you need to make your sushi rice dreams come true! Mastering this will elevate your sushi game from "meh” to "wow!" So, are you pumped to create that Perfectly Sticky Sushi Rice ? Whether you’re rolling sushi for a crowd or just treating yourself, you’ve got this!
Let’s dive into the step-by-step instructions that'll take you from novice to sushi master faster than you can say “sashimi!” Get ready to impress your friends and family with your culinary skills!
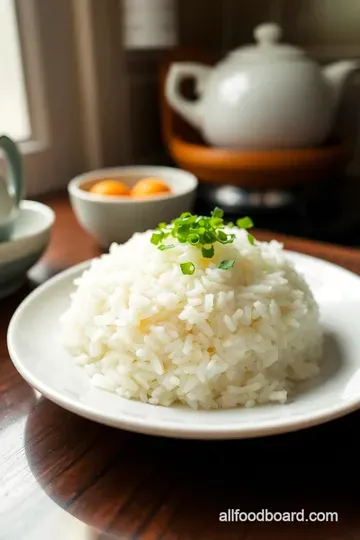
Perfectly Sticky Sushi Rice: A Beginner's Guide
Oh my gosh! if you've ever wondered how to make that perfectly sticky sushi rice that every sushi chef seems to whip up without breaking a sweat, you're in for a real treat.
You know, sushi rice is like the soul of the sushi world. it’s fragrant, slightly sweet, and just plain delicious.
And guess what? it’s not as complicated as it seems. let’s dive right in!
Essential Preparation Steps
First things first, let’s talk mise en place . this fancy french term just means getting all your ingredients ready before you start cooking.
For sushi rice, you’ll need 2 cups of sushi rice , 2 1/2 cups of water , and some seasoning— 1/3 cup of rice vinegar , 3 tablespoons of sugar , and 1 teaspoon of salt .
Get everything out and ready to roll.
Now, onto time management. soaking the rice for 30 minutes is not optional! it’s crucial for that sticky texture we’re after.
While it soaks, you can chill and enjoy a cup of green tea or scroll through some cat videos—no judgment here!
When you're cooking, organization is your best buddy. keep your kitchen clean, and have your cooking tools ready. this will save you time and frustration.
And don’t forget safety! make sure your rice cooker or pot is on a stable surface, and watch out for steam—yikes!
Step-by-Step Process
-
Rinse the rice : start by washing that sushi rice under cold water. you want to rinse until the water runs clear.
This gets rid of excess starch. sticky rice, yes—but too sticky? no, thanks!
-
Soak the Rice : After rinsing, move it to a bowl, add water, and let it soak for 30 minutes . Trust me; this step is vital for creating that delightful texture.
-
Cook the rice : drain the soaked rice and toss it back into your pot or rice cooker. pour in 2 1/2 cups of water .
Let it rest for 10 minutes , then crank the heat up! once it boils, lower the heat and cover it for 20 minutes .
If you're using a rice cooker, just follow the manufacturer’s instructions!
-
Prepare the Seasoning : While that rice cooks, warm up your seasoning ingredients in a small saucepan— rice vinegar, sugar, and salt —until the sugar dissolves. Set it aside to cool.
-
Season the Rice : Once the rice is cooked, fluff it with a wooden spoon (gently, please!). Pour the vinegar mixture over and fold it in softly to avoid mushiness.
-
Cool the Rice : Now, let that rice cool to room temperature. A fan can help speed things up, but it’s not a race!
Expert Techniques
Here’s where the magic happens! Using quality sushi rice is essential. If you're in a pinch, Arborio rice works too, but sushi rice will yield the best results.
When mixing the seasoning, go easy on the vinegar; taste it first. some brands can pack a stronger punch. also, avoid stirring the rice too aggressively.
Gently fold it, or you’ll end up with a mushy disaster. yikes!
Don’t forget to check for doneness—rice should be tender yet firm. A quick taste test won't hurt either, right?
Success Strategies
Common mistakes? let’s cover those! overcooking your rice is a biggie. remember, after simmering for 20 minutes , let it sit covered for another 10 minutes before you fluff it up.
Quality assurance tips? Always taste your rice! If it’s not right, tweak the seasoning for your next batch.
And don’t forget about make-ahead options. This sushi rice can be prepared a day in advance and stored in the fridge. Just remember to reheat it gently before serving!
In Conclusion
Crafting the best sushi rice recipe takes a bit of patience, but trust me—it’s worth it. whether you’re rolling out sushi rolls, creating cute nigiri, or just serving it on the side, this easy sushi rice recipe will have everyone asking for seconds.
As you whip up this sticky, tasty goodness, just remember to have fun. Cooking is about experimenting, so don’t be afraid to try new things and make it your own.
Now, if you’re itching for more tips and tricks about perfecting your sushi rice or exploring additional recipes, stay tuned for some Additional Information just ahead!

Pro Tips & Secrets for the Perfect Sticky Sushi Rice
Alright, let's dive into some insider tips on making the best sushi rice recipe you've ever tried! now, i’ve had my fair share of sticky situations (pun intended) while trying to nail down that perfect texture and taste, and honestly, it’s all about the little details .
First off, rinse that rice ! seriously, if you skip this step, you might end up with a gloppy mess instead of beautifully sticky sushi rice.
Give it a good rinse until the water runs clear. this gets rid of excess starch and makes sure each grain stays separate but still clings together when you need it to.
Now, when it comes to soaking your sushi rice , don’t rush it! you want to soak for about 30 minutes .
Trust me, you'll save time in the cooking process. this preps the rice to absorb water more evenly and helps with that beautiful texture we're aiming for.
Once it’s time to cook, use a rice cooker if you've got one. it’s like an automatic magic box – set it and forget it! if you’re using a pot, make sure to cover it and let it simmer low and slow.
After cooking, let it sit for about 10 minutes before you open it. this allows the steam to finish the job.
And don’t get too savage when you fluff the rice! a gentle touch with a wooden spoon or rice paddle is key to avoiding mush.
This isn’t a wrestling match; think of it as a delicate dance with your rice.
Finally, when it comes to seasoning, feel free to tweak the sushi rice vinegar recipe to suit your taste. some might want a bit more sugar, while others lean towards salt.
It’s all about that personal touch!
Perfect Presentation Tips for Your Sushi Rice
Now let’s talk presentation. i remember the first time i rolled my sushi; i was so proud until i saw it looked like a toddler made it.
Making it pretty is half the battle!
For plating, try using a clean, flat surface. a bamboo mat works wonders for rolling and gives that rustic vibe.
And don't forget to garnish . a sprinkle of sesame seeds or finely chopped green onions can make a huge difference.
You can also lay down a lovely piece of seaweed as a backdrop, just to give it that pop.
Consider color combinations too! bright green avocado, vibrant orange carrots, and deep purple cabbage can turn your plate into a work of art.
It’s all about making it visually appealing. remember, we eat with our eyes first!
Storage & Make-Ahead for Maximum Enjoyment
Life gets busy, and sometimes you want to prep ahead. here’s the lowdown on storage: sushi rice can be kept in an airtight container in the fridge for about 3 days .
If you want to save it longer, consider freezing it. just make sure it's cooled completely before you pack it up.
When it’s time to reheat, microwave with a sprinkle of water to keep it moist, or steam gently if you’re fancy. Just remember, the fresher it is, the better it tastes!
Creative Variations for Sushi Rice
Now, let’s spice things up! one of my favorite things about sushi rice is how versatile it is. if you’re feeling adventurous, why not try different flavor adaptations ? a dash of mirin can give it a sweet twist.
Want to follow seasonal trends? how about adding some diced mango for a tropical hit in summer?
If you have any dietary considerations, like being gluten-free, worry not! The sushi rice vinegar recipe can be easily modified, and using alternative fillings can keep things exciting.
Complete Nutrition Guide for a Guilt-Free Indulgence
For all you health nuts out there, here’s what you’re looking at with this sushi rice. one serving is about 210 calories with 4g of protein and nearly zero fat.
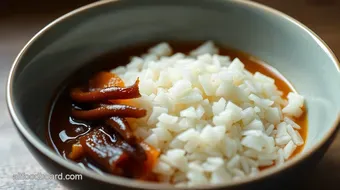
It's a great base for so many healthy toppings and fillings like cooked fish sushi or fresh vegetables.
Just be mindful about portion sizes; it’s easy to go overboard when you’re chowing down on tasty sushi rolls! Keep it balanced, and your belly will thank you.
Wrapping It All Up
So, you’ve got the scoop on how to make sticky rice for sushi that's absolutely perfection on a plate. Keep it simple, enjoy playing with flavors, and don’t sweat the small stuff.
Whether it’s a friday night sushi-making session with friends or a solo kitchen adventure, pare it down to joy. always remember, food is about sharing experiences and memories.
Let your creativity shine, and above all, have fun!
After all, you’ve got this! Let’s get rollin’ with that perfectly sticky sushi rice!
Frequently Asked Questions
What kind of rice should I use to make sushi rice?
For the best sushi rice, you should use Japanese short-grain rice, often labelled as 'sushi rice'. This type of rice is sticky and has the perfect texture for sushi, allowing it to hold together when rolled or shaped. Avoid using long-grain rice as it won't provide the same results!
How do I store leftover sushi rice?
If you have leftover sushi rice, let it cool completely, then transfer it to an airtight container. You can store it in the fridge for up to 3 days. To reheat, add a splash of water and microwave in short intervals, covering it with a damp paper towel to retain moisture.
Can I make sushi rice in a rice cooker?
Absolutely! A rice cooker is a fantastic tool for making sushi rice. Just rinse and soak your rice, then follow your rice cooker's instructions for the correct water-to-rice ratio. This method can save you time and ensures even cooking.
What can I use instead of rice vinegar for sushi rice?
If you find yourself in a bind without rice vinegar, you can use white wine vinegar as an alternative. Just keep in mind that it might alter the taste slightly, so you may want to adjust the sugar in the seasoning to balance the acidity.
What’s the secret to achieving the perfect texture with sushi rice?
The key to perfect sushi rice is in rinsing it thoroughly to remove excess starch, which helps achieve that desired stickiness. After cooking, be gentle when fluffing and mixing in the vinegar seasoning; you want to keep the grains intact without turning it mushy.
How can I make my sushi rice more flavourful?
To enhance the flavor of your sushi rice, you can experiment with adding a bit of mirin or a small piece of kombu (dried kelp) while cooking. These additions provide depth and a nice umami kick that pairs beautifully with your sushi creations!

Perfectly Sticky Sushi Rice: A Beginner's Guide Card
⚖️ Ingredients:
- 2 cups sushi rice (320g), preferably Japanese short-grain
- 2 1/2 cups water (600ml)
- 1/3 cup rice vinegar (80ml)
- 3 tablespoons sugar (36g)
- 1 teaspoon salt (6g)
🥄 Instructions:
- Step 1: Place the sushi rice in a fine-mesh sieve/colander. Rinse under cold water until the water runs clear to remove excess starch.
- Step 2: Transfer the rinsed rice to a bowl, add water, and soak for 30 minutes.
- Step 3: Drain the soaked rice and transfer it back into the pot or rice cooker. Add 2 1/2 cups of fresh water and let it rest for 10 minutes. Cook on high heat until boiling, then reduce to low, cover, and simmer for 20 minutes.
- Step 4: In a small saucepan, combine rice vinegar, sugar, and salt. Heat gently, stirring until sugar and salt are dissolved. Set aside.
- Step 5: Once cooked, fluff rice gently with a wooden spoon or rice paddle to separate grains. Transfer to a large bowl and gradually pour the seasoning over rice, gently folding it in a cutting motion until evenly coated.
- Step 6: Allow rice to cool to room temperature, using a fan if desired for quicker cooling.
Previous Recipe: Fluffy Cottage Cheese Pancakes: An Easy, Delicious Breakfast Recipe
Next Recipe: Ultimate Rice Crispy Treats Recipe: Easy and Nostalgic Homemade Delight